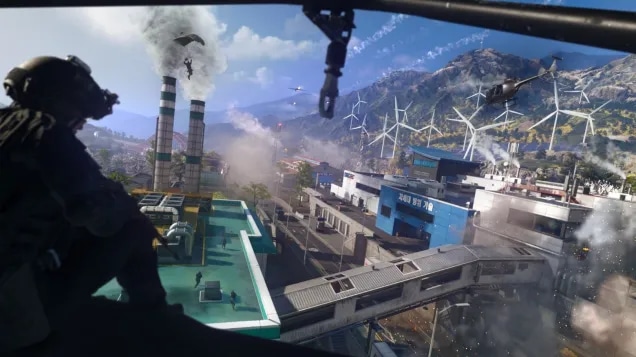
The best Zodiac Resurgence landing spot gives your squad access to weapons, cover and a practical first rotation. Solar and Cooling suit teams that want to equip themselves before pushing, Old Mines offers covered movement, and Admin or Trackline puts you closer to early engagements.
Your choice should follow the flight path and the teams descending around you. Mark a specific building, choose a backup and land close enough for teammates to support each other.
Best Zodiac Landing Spots at a Glance
| Landing spot | Best suited to | Opening priority | Change your route when |
|---|---|---|---|
| Solar | Squads seeking a measured start | Loot an outer structure and check the Admin approach | Opponents control the crossing |
| Cooling | Teams planning to loot before moving inland | Equip near waterfront cover | The circle pulls away from the southern side |
| Old Mines | Squads comfortable with enclosed routes | Secure an entrance and assess the underground path | Enemies hold the exit you need |
| Admin | Teams seeking immediate fights | Establish control of one level together | Another squad reaches your intended floor first |
| Trackline | Flexible teams assessing railway opportunities | Find weapons before approaching a train | The tracks or boarding route are exposed |
These are recommended opening plans. Loot distribution, contracts and enemy positions can change which route is worth taking.
Solar: Loot First, Then Assess Admin
Solar is a useful starting point when your squad wants an outer position with the option to move toward Admin. Mark one structure or section of the area so teammates can gather equipment without becoming isolated.
Once everyone has a weapon and plates, check the tower and the ground between you. Moving solar panels can alter sightlines, so inspect the crossing before relying on them for cover.
Push Admin when the approach is manageable and your squad is ready to enter together. If an opposing team controls the route, use another covered path toward the circle. Solar works best as a flexible opening rather than a commitment to challenge the tower every match.
Cooling: Build a Route Toward Depot or Furnace
Cooling provides a southern waterfront start with potential rotations toward Depot and Furnace. Begin near accessible cover, then use the tactical map to identify an inland objective.
Plan the move before searching every building. A circle pulling away from the waterfront makes an earlier departure more valuable, particularly when the next route passes through industrial interiors.
At Furnace, check around machinery and conveyor belts before crossing. Keep a close-range weapon available for enclosed fights, while a teammate covers the next doorway or longer approach.
Old Mines: Use Underground Routes With a Clear Exit
Old Mines suits teams that prefer covered approaches and are comfortable clearing confined spaces. Secure equipment near an entrance, then decide whether the tunnel network leads toward your intended destination.
Choose the exit before committing to the underground route. As you approach it, pause behind cover and check outside. Keep a second player close enough to support the first player through.
When an opponent holds the opening, regroup inside and assess another route. The advantage of Old Mines is access to alternative movement; preserve that flexibility instead of repeatedly challenging a watched exit.
Admin: Secure One Floor Before Expanding
Admin is a direct choice for squads that want early combat and a useful view over nearby areas. Agree on the same landing section before jumping. A coordinated foothold is easier to defend than players scattered across several floors.
After securing your level, listen above and below before moving through the tower. Use height to identify nearby movement and plan the next rotation, then return to cover.
If another team reaches your selected floor first, call the backup while airborne. Once inside, avoid sending teammates individually into the same defended angle. Reposition together or leave through a different approach.
Trackline: Treat Trains as a Route Opportunity
Trackline gives your squad access to railway movement and passing trains. Start near cover and collect weapons before deciding whether boarding fits your opening.
Check the tracks, nearby rooftops and the route back off the train. Have teammates watch the approaches while one player searches the cars, then regroup before moving.
Train loot varies, so base the decision on access and positioning. A passing train is worth assessing when it supports your route; chasing it across open ground can separate the squad from its next objective.
Turn the Opening Loot Into a Useful Rotation
Prioritize a usable weapon, ammunition and plates. An SMG supports fights inside towers, tunnels and industrial rooms, while an assault rifle helps cover movement between structures.
Once the squad can defend itself, select a nearby contract or Buy Station that moves you toward a useful position. Check the displayed reward and approach before committing. Pool cash from cover, with one teammate watching nearby angles while another uses the station.
When teammates redeploy, agree on a landing ping before they descend. A nearby unoccupied building can provide equipment and a place to regroup. Returning to the original fight makes sense only when the squad has checked whether opponents still control it.
Prepare Your Loadout Before Learning a Route
Use the Firing Range to compare attachments, then practice the complete class through movement, target transitions and weapon switching. CoD MW4 Bot Lobbies can provide a setting for rehearsing those skills.
If you are looking for a CoD MW4 Bot Lobby for sale, choose a practice session around a specific goal, such as tracking while strafing or switching to a close-range weapon. Apply that preparation in Zodiac matches while learning the terrain itself.
Start with one landing area and learn its first loot stop, two exits and nearby cover. Before each drop, confirm the primary building and backup with your squad. After landing, let the circle and opposing teams determine whether you push, hold or rotate.